Recipe: Fresh vegetable kakiage fritters | The Japan Times
Deep frying fresh vegetables like these is not as popular when they’re in season, but it’s still one of the easiest ways to bring out the sweetness and crunch of veggies.
Deep frying fresh vegetables like these is not as popular when they’re in season, but it’s still one of the easiest ways to bring out the sweetness and crunch of veggies.
A reliance on imports is said to have left the UK vulnerable to ‘shock weather events’.
This content was originally published here.
Homemade samosas are a world away from those dry. cardboard triangles sold under the name in supermarkets. Instead, they have delicately flaky and deliciously rich pastry and a generous stuffing that’s easily tweaked to suit all tastes. Veggie-friendly, portable and very moreish, they’re easy to prepare ahead, too, making them a great choice for picnics or taking to work for lunch.
Prep 15 min
Rest Up to 1 day
Cook 1 hr
Makes 24 mini samosas or 12 larger ones
For the pastry
130g plain flour
¼ tsp salt
½ tsp nigella seeds (optional)
2 tbsp neutral oil, plus extra for greasing
For the filling
1 medium potato (about 175g)
1 small green chilli
1 tbsp finely grated ginger
1 tbsp neutral oil
½ onion, finely chopped
½ carrot, finely chopped
50g green cabbage, cored and finely shredded
50g paneer, cut into small dice (optional; or crumbled feta, chopped cashews or peanuts, or more of the vegetables)
Fine salt
40g peas
Juice of ½ lemon
1 small bunch fresh coriander, finely chopped
Neutral oil, for deep-frying
For the masala
10g cinnamon sticks
1 tsp cloves
1½ tsp cumin seeds
3-4 small dried red chillies
To make the pastry (if you’re really averse to pastry making, you could use two layers of filo brushed with melted butter instead, but I promise you it’s worth the relatively minimal effort), put the flour in a large bowl and whisk in the salt and nigella seeds, if using (though optional, they look pretty and taste great).
Rub the oil into the flour, then add just enough cold water (probably about 50ml) to bring everything together into a stiff dough. Knead the pastry on a lightly greased surface for about five minutes, until smooth, then brush with a little oil, cover and leave to rest. (You can make this a day ahead and store, wrapped in the fridge.)
Give the potato a good scrub (leave the skin on, unless it’s very dirty) and put it in a small pan of cold water with a generous shake of salt. Bring to a boil, simmer until tender in the centre, then drain, return to the hot pan and leave to steam dry. Roughly mash the potato, then set aside.
While the potato is cooking, finely chop the chilli, removing the seeds and pith if you don’t want the samosas to be too hot. Pound to a paste with the grated ginger, then set aside. Toast the ingredients for the masala in a hot pan until fragrant, then grind to a smooth powder.
Put the oil in a large frying pan on a medium heat and fry the onion until soft. Add the carrot, turn down the heat slightly, and cook, stirring, for five minutes. Add the cabbage and fry for another five or so minutes, until it’s beginning to soften. Meanwhile, if using paneer, sprinkle it with salt (there’s no need to do this if you’re using a saltier cheese).
Add the paneer and peas, cook for a couple of minutes, then stir in the ginger and chilli paste and half a teaspoon of the masala spice blend, and cook, stirring, for another couple of minutes. Stir in the mashed potato and lemon juice, then season to taste. (You can, if need be, make the filling a couple of days in advance.)
Divide the pastry into 12 x roughly 18g balls for small samosas (or six x 35g ones for larger pastries), then cover with a damp tea towel so they don’t dry out. Roll out one ball into a roughly 10cm-diameter circle (or 18cm for larger samosas), then cut it in half. Wet the round edge of one half with water, form into a cone, then press together the edges to seal.
Stir the coriander into the filling mixture, then stuff into the cone. Wet the top edge, pinch to close, then fold over any remaining pastry. Repeat with the remaining dough balls and filling, making sure each samosa is well sealed. (Once filled, they can be kept, covered and in the fridge, for a few hours until you’re ready to fry.)
Heat a deep frying pan with about 4cm of oil to about 175C (or use a deep-fat fryer). When the oil has come up to temperature, add a batch of samosas (don’t overcrowd the pan) and cook until golden brown, turning as necessary. Scoop on to paper towels and serve immediately, or pack in a single layer for transporting.
Come and get it! Fresh strawberries at Witte’s Vegetable Market in West Bend, WI | By Gus Witte
People whose diets contain green leafy vegetables may have fewer proteins in their brains linked to Alzheimer’s disease compared to those whose diets do not, a new study suggests.
A study published in Neurology analysed the diets and how they could play into the risk of Alzheimer’s. It found that those who followed Mediterranean and MIND diets – both of incorporate leafy veg – were associated with fewer plaques and tangles linked to Alzheimer’s.
This build-up of proteins that clump together in the brain is a signs of the disease, although scientists said does not establish a cause and effect relationship.
The Mediterranean diet recommends vegetables, fruit, and three or more servings of fish per week while the MIND diet prioritises spinach, kale and collard greens.
Eating six servings of green leafy vegetables or passing on fried foods could make your brain seem as if four years younger, said study author Puja Agarwal of RUSH University in Chicago.
She said: “These results are exciting. Improvement in people’s diets in just one area – such as eating more than six servings of green leafy vegetables per week, or not eating fried foods – was associated with fewer amyloid plaques in the brain similar to being about four years younger.”
Dr Agarwal added: “Our finding that eating more green leafy vegetables is in itself associated with fewer signs of Alzheimer’s disease in the brain is intriguing enough for people to consider adding more of these vegetables to their diet.”
The study involved 581 people with an average age of 84. Participants completed annual questionnaires asking how much of various foods they ate. Those involved in the research died an average of seven years after the start of the study.
Right before death, 39 percent had been diagnosed with dementia. When examined after death, 66 percent met the criteria for Alzheimer’s disease.
During a post-mortem examination, researchers examined their brains to determine the amounts of amyloid plaques and tau tangles.
Both are found in the brains of people with Alzheimer’s disease but may also be found in the brains of older people with normal cognition.
The researchers found that people who scored highest for the Mediterranean diet had average plaque and tangle amounts in their brains similar to being 18 years younger than people who scored lowest.
People who had eaten the most green leafy vegetables, or seven or more servings per week, had plaque amounts in their brains corresponding to being almost 19 years younger than people who ate the fewest, with one or fewer servings per week.
Dr Agarwal commented: “Future studies are needed to establish our findings further.”
Don’t miss the latest news from around Scotland and beyond – sign up to our daily newsletter here .
This content was originally published here.
This Chicken and Vegetable Pasta Bake is the perfect way to sneak some extra veggies into your family’s diet. It’s delicious, easy to make, and a great way to use leftover vegetables in your fridge. Give it a try and see how quickly your kids will gobble up their greens without realising it!
This Chicken and Vegetable Pasta Bake is packed with chicken, pasta, loads of fresh vegetables, and cheese, this dish combines flavours everyone in the family will love. And the best part: since it involves hiding veggies in the sauce, you can sneak them into your kids’ meals without any complaints. Plus, it’s an inexpensive meal that won’t break the bank – so you can feed your entire family without breaking your budget.
Not only is this Chicken and Vegetable Pasta Bake a great way to prevent waste, but you can also easily customise it by adding in whatever vegetables you have on hand. The possibilities are endless, you could try capsicum, broccoli, zucchini, or spinach.
Share a photo and tag us @theorganisedhousewife
— we can’t wait to see what you’ve made!
Need to use up some vegetables? Mix your vegetables with some cooked pasta, cheese sauce and chicken, and pop it all in the oven for a delicious and hearty dinner.
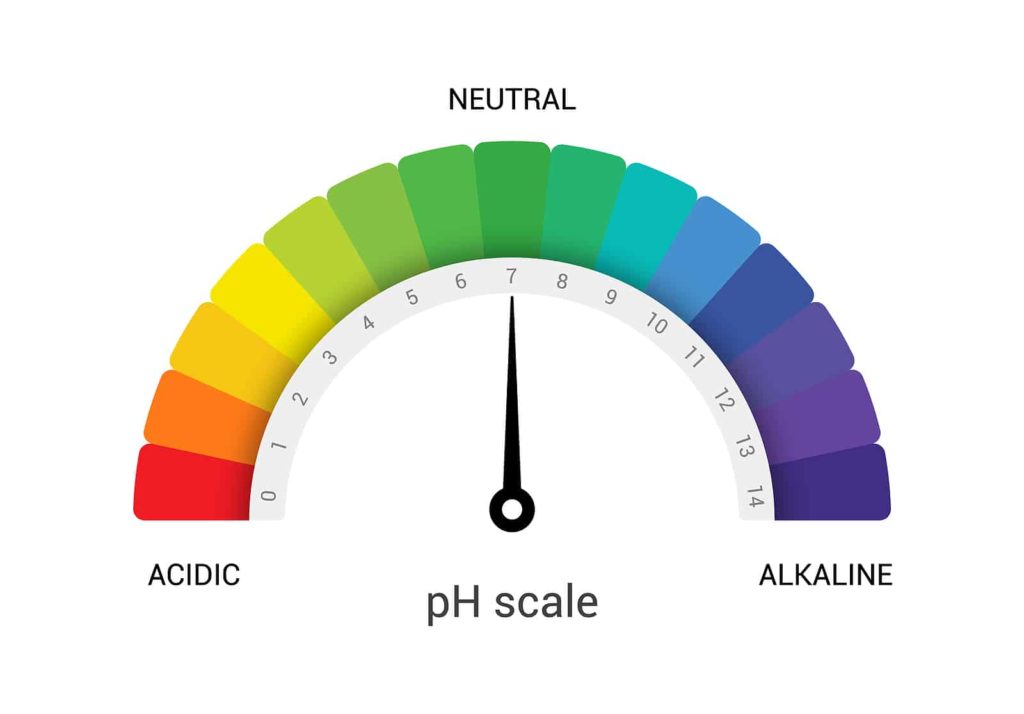
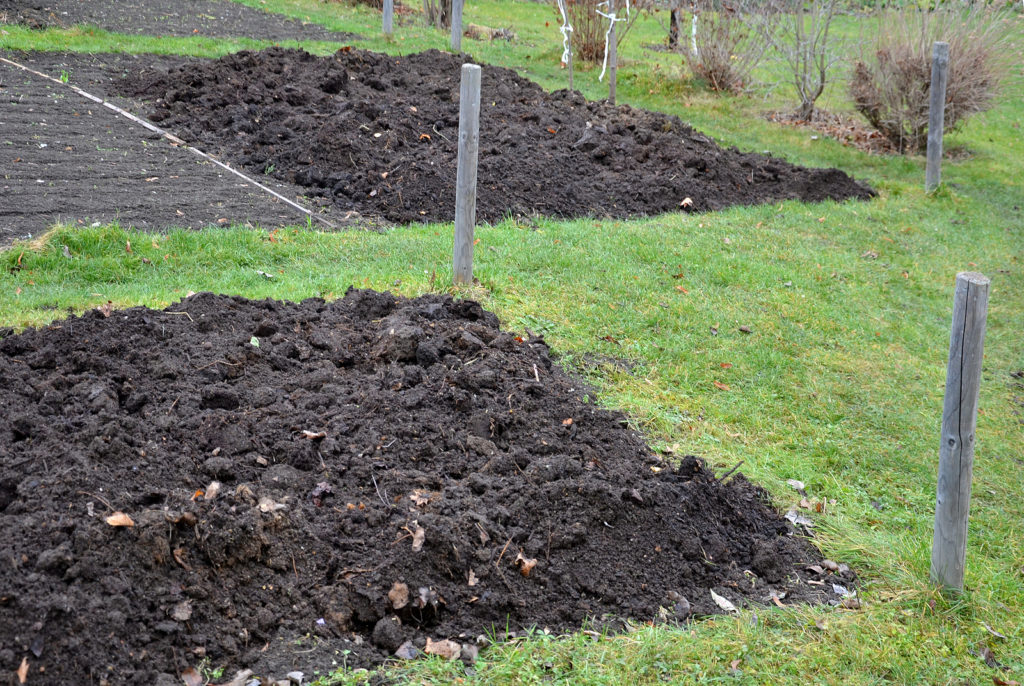
Soil pH is a scale used to measure the soil’s acidity or alkalinity. Alkaline soil is called “sweet” by gardeners and farmers; acidic soil is called “sour.” Soil pH is measured on a scale of 0 to 14, with 7 being neutral. Acidic soil measures below 7; alkaline soil measures greater than 7.
Soil pH is important because plants can’t absorb nutrients if the pH is too high or too low. A pH test will not tell you what nutrients are in the soil, but it will tell you whether the soil is too acidic or too alkaline for nutrients to be released.
Soil pH affects how vegetables and other plants grow.
Vegetable crops and other plants get most of the nutrients they need from the soil; the nutrients–mostly minerals–are dissolved in soil moisture and taken up by plant roots (other nutrients come from the air and are taken in by plant leaves). A plant root’s ability to absorb mineral nutrients is affected by the chemical balance of what is called the soil solution; soil solution is a mix of mineral nutrients and soil moisture. If a soil mineral can’t dissolve in soil moisture it will not be available as a nutrient for uptake into the plant.
A mineral nutrient’s ability to dissolve in soil water is chemically affected by the soil’s acidity or alkalinity, essentially the amount of calcium—chalk, and lime—in the soil. If soil is too acidic or too alkaline many mineral nutrients will not dissolve in soil moisture.
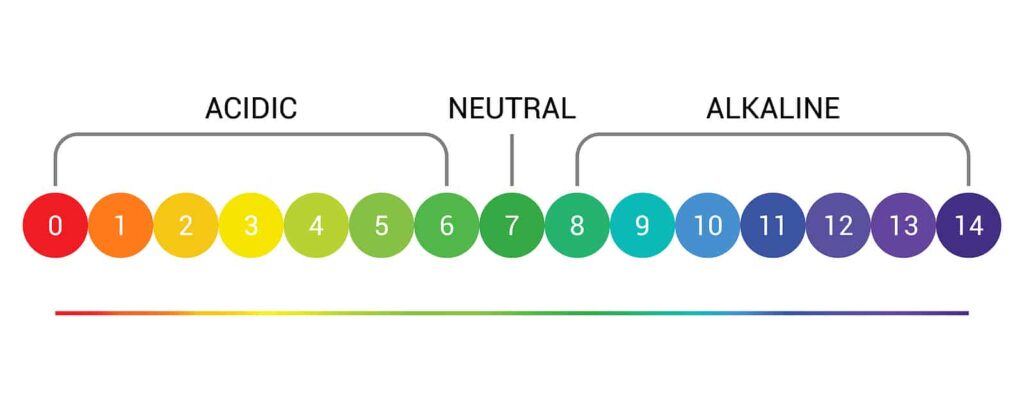
pH is a measure of the soil’s acidity or alkalinity. The pH scale or measuring stick numbers from 1 to 14:
(By way of reference, lemon juice has a pH of 2; orange juice has a pH of 4; baking soda has a pH of 8.5 and ammonia has a pH of 11.5.)
Most nutrients needed by vegetables become chemically available when the soil pH falls between 6.0 and 7.5.
| Soil pH | Vegetable |
| 6-8 | Asparagus, beet, cabbage, muskmelons |
| 6-7.5 | Peas, spinach, summer squash |
| 6-7 | Cauliflower, celery, chives, endive, horseradish, lettuce, onions, radishes, rhubarb |
| 5.5-7.5 | Corn, pumpkin tomatoes |
| 5.5-6.8 | Beans, carrots, cucumbers, parsnips, peppers, rutabagas winter squash |
| 5.5-6.5 | Eggplant, watermelons |
| 4.8-6.3 | Potatoes |
The most important mineral nutrients essential for plant growth are nitrogen, phosphorus, and potassium. Nitrogen promotes leafy growth; phosphorus is important for root growth and the production of flowers, fruits, and seeds; potassium is necessary for the development of leaves and roots and all-around plant health. Other nutrients taken up through the soil solution are calcium, sulfur, and magnesium in moderate quantities and trace quantities of iron, manganese, zinc, boron, copper, and molybdenum.
When the soil pH falls below 5.0 and becomes moderately acidic, nitrogen, phosphorus, and potassium cannot be dissolved in the soil solution and become chemically unavailable or “locked up.” Calcium and magnesium also become unavailable in moderately acidic soil. When the soil pH rises above 7.5 and becomes increasingly alkaline, iron, manganese, and phosphorus become unavailable or “locked up.”
Soil acidity and alkalinity also affect soil-dwelling microorganisms and earthworms which are essential to the decay cycle and soil health. Many microorganisms become less active as the soil becomes more acidic, and they stop activity altogether when the pH falls below 4.5.
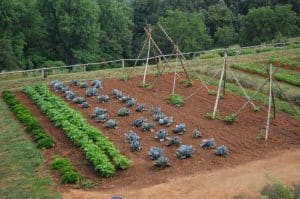
Vegetables and other plants grow best when the soil pH is optimal for the plants being grown. It is important to match a plant to the soil pH or to adjust the soil pH to a plant’s needs.
Soil pH is important because a soil’s acidity or alkalinity determines what plant nutrients are available to plant roots. Nutrients in the soil—elements such as nitrogen, phosphorus, and potassium—become available to plants when they dissolve in water or soil moisture. Most plant nutrients will not dissolve when the soil is either too acidic or too alkaline.
Knowing the soil pH in the planting beds in your garden will allow you to group plants by their pH needs. Grow together plants with like pH needs, similar temperature tolerances, and nutritional needs.
The results of a soil pH test will indicate how acidic or alkaline your soil is. Organic soil amendments are the best way to adjust soil pH. Adjusting soil pH is not an exact science and takes time.
A pH test number that is more than 0.5 on either side of the optimal pH number for the plants you want to grow will require a soil amendment or additive to adjust the pH. A pH test number that is within 0.5 of the optimal pH number for the plants you want to grow does not require soil amendments.
You can test the soil in your garden yourself, or you can send it to a soil testing lab.
Home do-it-yourself soil-test kits test for soil pH (the relative acidity or alkalinity) and major soil nutrients–nitrogen, phosphorus, and potassium. DIY soil-testing kits do not test for micronutrients or organic matter content. The advantage of a DIY kit is that you can test individual beds and get immediate results.
Professional laboratory tests—from a commercial lab or from your state Extension Service–provide more information than home tests, usually pH, nitrogen, phosphorus, and potassium levels, values for secondary mineral elements and micronutrients, and also a report on organic matter in the soil. Professional lab tests cost more time and money than DIY tests.
Take a soil sample on a dry day. Use a clean trowel or spade or a soil sampling probe—a length of pipe with a sharp to pierce the soil.
Home soil test kits commonly use pH-sensitive paper or film or water-soluble powder. Once you have a soil sample, add mineral-free distilled water to make a slurry then dip in the pH-sensitive paper or add a bit of your sample to the pH-sensitive powder (just follow the instructions that come with your soil test kit).
Compare the color of the paper or solution to those on the chart provided with the kit. Your soil will fall between a pH of 4.5 and 8.5. A chart with the kit will tell you if your soil requires amendments to change the pH or additional fertilizer for the plants you want to grow.
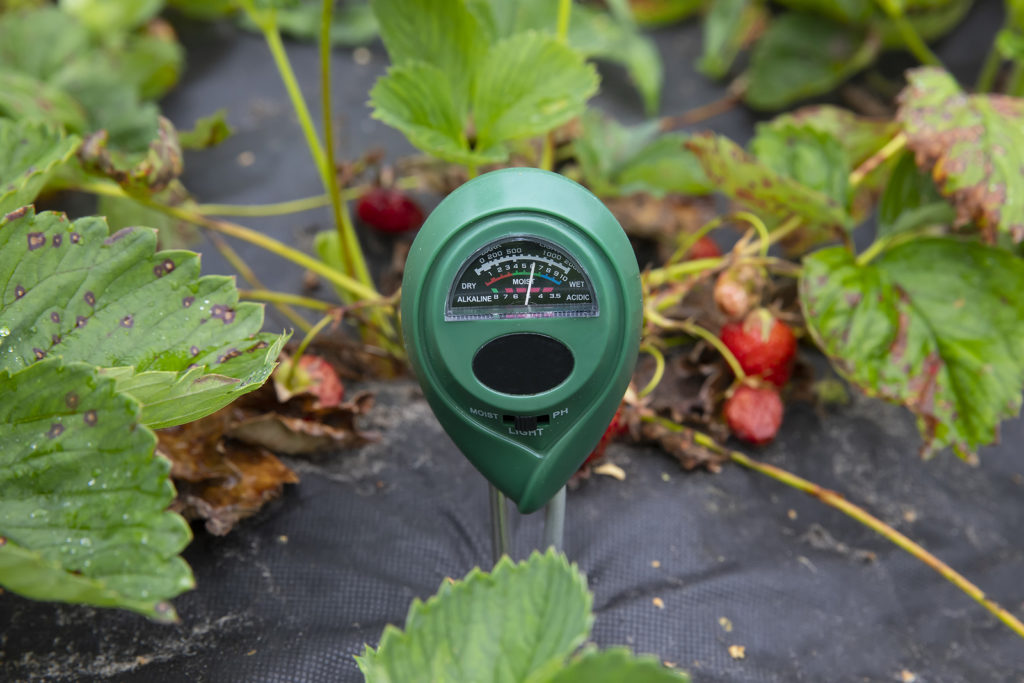
The availability of nutrients to your plants depends on how acidic or alkaline the soil is. A hand-held pH meter will give a reading of the soil’s pH after the prongs are inserted into the soil.
The greatest availability of nutrients–nitrogen, phosphorus, potassium, sulfur, calcium, magnesium, iron, manganese, boron, copper and zinc, and molybdenum—occurs when the soil pH is between 5.5 and 7.5.
Test the soil periodically throughout the growing season. It is especially important to test before planting in Spring and when preparing your planting beds for the next season in Fall. If plants are not growing. A good time to begin adjusting the soil pH is in the fall; check the progress again in the sprig. Check the soil regularly–twice a year is ideal.
A soil sample from your garden can be tested by a soil lab. A lab test will make specific recommendations on how to correct soil that is too acidic or too alkaline. You can also test soil pH yourself with a home soil test kit or a portable pH meter.
The results of a soil pH test will indicate how acid or alkaline your soil is. Organic soil amendments are the best way to adjust soil pH. Adjusting soil pH is not an exact science and takes time.
A pH test number that is more than 0.5 on either side of the optimal pH number for the plants you want to grow will require a soil amendment or additive to adjust the pH. A pH test number that is within 0.5 of the optimal pH number for the plants you want to grow does not require soil amendments.
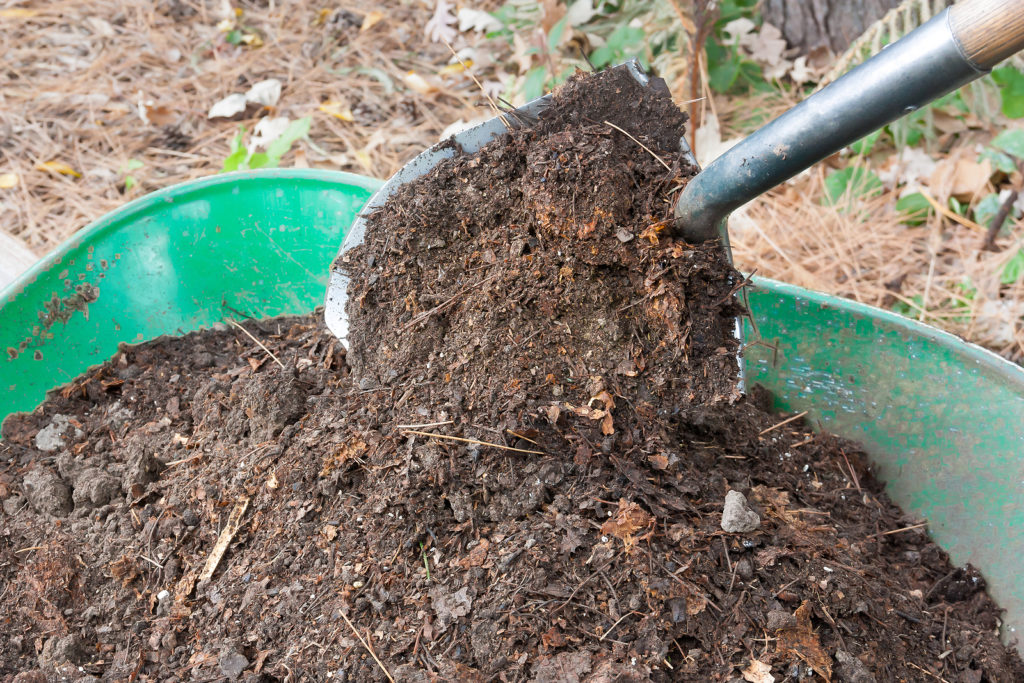
The quickest way to change soil pH is to add either agricultural sulfur (powdered sulfur, aluminum sulfate, or iron sulfate) to make alkaline soils more acidic or agricultural ground limestone to make acid soils more alkaline. The best long-term way to improve soil pH is to add other slower, but longer-acting organic materials (see the lists below).
The amount of additives or amendments necessary to correct soil pH varies according to soil texture. Sandy soil requires the least amount of additive, loamy soil a bit more, and clay soil the most. To determine the texture of your soil, wet a bit of garden soil and rub it between your fingers; if the soil feels gritty it is sandy; if it feels smooth like flour it is loamy or silty, if it feels sticky or slippery it has high clay content.
If you are adding agricultural sulfur or ground limestone to your garden, follow the recommended application rate listed on the package or bag. The amount will vary according to the type of soil in your garden and the number of square feet you are amending.
After adding sulfur or limestone or any soil additive to your garden re-test the soil in 40 to 60 days. Expect small changes to the pH—0.5 to 1 unit at most. Allow at least five or six weeks between the applications of soil amendments. Work steadily towards achieving the pH that will be ideal for plants you want to grow. Changing the soil pH by one unit each year is reasonable.
A good time to begin adjusting soil pH is in the Fall; check the progress again in the Spring. If you begin the process in Spring, start early–at least three weeks before planting. This will allow soil additives to begin to break down and start working. Check the soil pH regularly—twice a year is ideal.
Regions that are very dry and droughty can have alkaline soil. It is rare that soils are too alkaline, but if that is the case in your garden add sulfur to the soil. Elemental sulfur, Epsom salts, gypsum, and fish emulsion are three sources of sulfur. To correct alkaline soil, add elemental sulfur at the rate of 4 pounds per 100 square feet for each unit of pH above 7. Again, follow soil lab recommendations when adjusting soil pH.
The best way to lower soil pH to neutral 6.0 to 7.0 is to add naturally acidic organic materials:
If your garden is in a region of low rainfall, a high pH could be the result of accumulated salts. Flush salts below the root zone of sensitive plants such as beans, carrots, onions, and peppers by watering regular non-saline water. Also add compost, mulch, or leaf mold.
The best time to correct soil alkalinity is in the Fall; that will allow organic materials time to decompose (organic materials tie up nitrogen while decomposing).

To improve acidic soil, add alkaline material, a process commonly called liming. Ground limestone, specifically calcitic limestone, is the most common material used to raise the soil’s pH. Ground limestone is slow to break down in the soil and is best added in autumn to improve the soil in time for spring planting. As a general rule, add 4 to 5 pounds of ground limestone per 100 square feet for each unit of pH below 6.5.
Regions with heavy rainfall and forest cover tend to have acidic soil. A soil that tends toward acidic should be limed every third or fourth year in the autumn. Apply lime a month before adding manure or compost to avoid undesirable chemical reactions. It is important to note that soil texture also can affect how additives raise or lower soil pH so if your soil is problematic have it tested and follow the soil lab recommendations.
To raise soil pH of acid soil add any of these long-acting organic materials:
The best time to correct soil acidity is in the Fall. If you want to correct soil acidity in the Spring do so at least three weeks before planting; that will allow time for soil additives to begin to work
Altering soil pH is not an exact science and takes time; you should not expect an immediate change. After adding lime or sulfur to your garden re-test the soil in 40 to 60 days. Expect small changes to the pH–0.5 to 1 unit at most. Work steadily towards achieving the pH that will be ideal for the plants you want to grow.
This list will allow you to group plants in your garden according to their soil pH tolerances. You will find that in the lists below, some plants may be repeated if they have a wide soil pH range tolerance; that is some plants will grow equally well in acid or alkaline soil.
The following crops prefer a pH of 4 to 5.5:
The following crops can tolerate a pH of 5.5 to 6.5:
The following crops will tolerate a pH of 6.0 to 7.0 or greater:
The following crops have the greatest tolerance for a wide range of soil acidity or alkalinity, from about 5.0 to 7.0:
The post Vegetable Garden Soil pH appeared first on Harvest to Table.
This content was originally published here.
Hardin County – The Hardin County OSU Extension Master Gardener Volunteers are hosting “An Evening Garden Affair” on Monday evening, June 26 at the Friendship Gardens of Hardin County located at 960 W. Kohler Street in Kenton.
The event is from 6:30 to 8:00 pm and will feature John King, Hancock County Master Gardener Volunteer, and part-time horticulturist with the Findlay Country Club. He is a 1983 graduate of the University of Kansas where he received a degree in Biology.
The topic of the program will be “Small Space Vegetable Gardening.” King will discuss the advantages and disadvantages of growing vegetables in pots and grow bags as well as the square foot gardening method, touching on the Mittleider gardening method. The Mittleider gardening method was developed for growing plants in a soilless medium to create high yield vegetable gardens under precisely controlled feeding and watering conditions.
Attendees will gather in the Friendship Gardens of Hardin County for tours at 6:30 pm with Hardin County OSU Extension Master Gardener Volunteers. Learn about the many different themed gardens at this educational demonstration garden. There will be snacks and drinks available, along with free plants to lucky attendees before moving to Simon Kenton School gymnasium with seating at 7:00 pm for the program presented by speaker John King.
This event is free and open to the public, rain, or shine. Those who have an interest in gardening will not want to miss this event. Parking is available at the garden off West Kohler Street or in front of Simon Kenton School.
For further information contact the OSU Extension office at 419-674-2297.
This content was originally published here.
The final words of veteran Don Brymo Uchegbu have been revealed. The last words of famous actor Don Brymo Uchegbu have finally been disclosed. Gistlover
This content was originally published here.
Nature is a thing of beauty, from verdant plant life to adorable critters. But for those trying to grow a garden of their own, animals can completely devour a vegetable patch overnight. But there’s a simple and unexpected trick to humanely keep animals away from those precious plants: plastic forks.
Chemicals that fulfil this purpose have advanced over the years to become efficient but they still come with downsides. Also, those who love nature probably don’t want to be totally isolated from animals – just their appetites that can ruin months of work. Plastic forks are a peaceful way of saying “Off Limits.”

Biology has taught just about every living creature what it needs even without any blatant lessons. For example, some birds understand quickly that vibrant butterfly wings mean toxicity. In that same vein, small animals will be wary of foreign objects like plastic forks stood upright between plants. They’re unfamiliar, and so should be avoided or approached with extreme caution. The shiny texture also may make birds wary, similar to how birds stay away from wreaths if the decorative arrangement has aluminum in it.
If an animal does investigate, the area, it will then be confronted by the tines. It doesn’t have to necessarily touch it – at all, or in a very hard manner – before it gets spooked by the tine’s point. Just touching it will teach the animal that the fork is a threat and to stay away.
Animals keep away from plastic forks stationed throughout a garden because they look out-of-place. They look out-of-place to the gardener too. So, there are more subtle ways of keeping various critters from munching on the flowers and vegetables, all humane. There are various plants that repel animals like deer, including hyacinths and marigolds. In these cases, it’s the smell that really does the trick – although marigold scent can win over or repel people too.

There are also humane tools that can protect a garden, whatever its layout. Family Handyman suggests a wire cloche, which acts like a large mesh bubble and can keep deer away, although squirrels will have no trouble getting in. The same outlet also notes that milk serves as a deer repellent, and gardeners can use baffles to keep the smaller critters away.
How do you keep your garden safe?
The post Plastic Forks Are The Key To Keeping Animals From Eating Your Vegetable Garden appeared first on DoYouRemember? – The Home of Nostalgia. Author, Dana Daly